
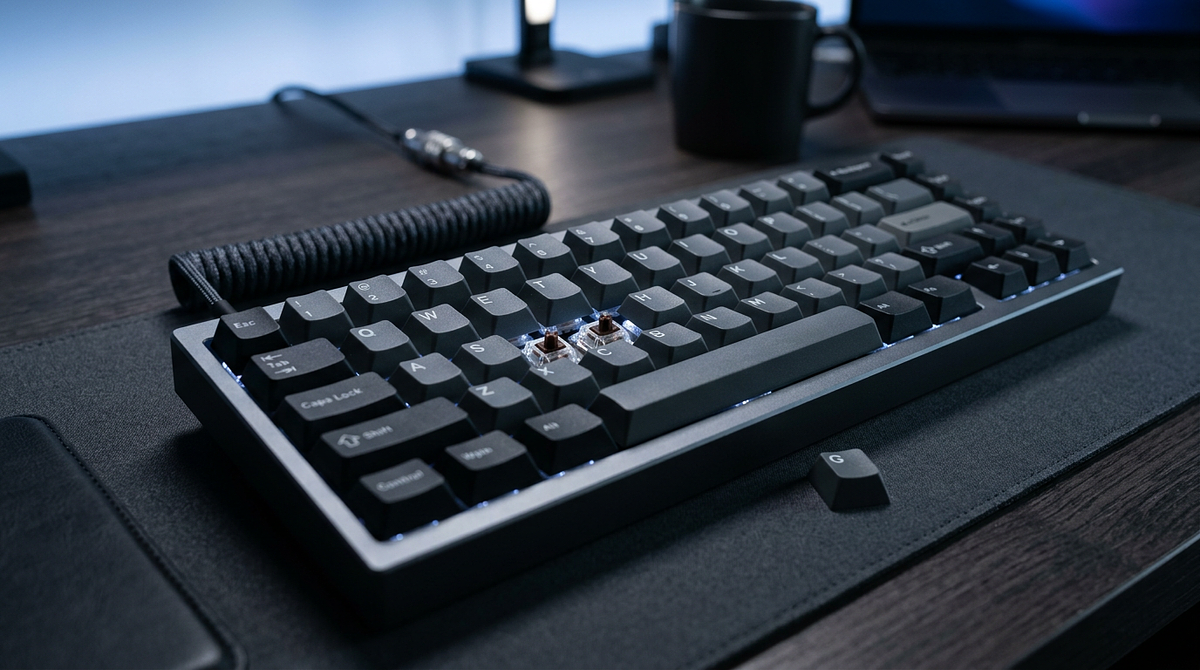
Mechanical keyboards use individual switches under each keycap to register keystrokes. That gives them a distinct feel and makes them last much longer than standard membrane keyboards. This page covers the components that determine how a mechanical keyboard performs, including switch types, layout options, and common terminology. By the end, you’ll know enough to compare options and pick a keyboard that fits how you type and what you need it for.
What Are Mechanical Keyboards and Why Do They Matter
How Mechanical Keyboards Differ From Membrane Keyboards
The way these two keyboard types are built creates noticeably different typing experiences. Mechanical keyboards use individual spring-loaded switches under each keycap. A stem moves straight down through a housing to complete an electrical circuit. Each switch works independently with its own spring, so the force and travel distance stay consistent across every key.
Membrane keyboards work by compressing a single rubber dome layer against a circuit board. Because it’s one shared sheet, the feel degrades unevenly as the rubber ages and loses its elasticity. That basic construction difference gives mechanical keyboards some real practical advantages:
- Consistent actuation force across 50+ million keystrokes per switch, compared to 5-10 million for membrane domes
- Precise actuation point typically at 2mm of travel, which lets keys register faster than membrane’s full 4mm compression requirement
- Individual switch replacement when something fails, so the keyboard can last indefinitely instead of getting thrown out when a membrane wears out
- Customizable typing experience through switch selection, something membrane keyboards simply don’t offer
Tactile Feedback and Sound Characteristics
Mechanical switches give you three types of feedback that membrane keyboards can’t replicate. Linear switches travel smoothly from top to bottom with no interruption. Tactile switches have a deliberate bump at the actuation point, so you feel a physical signal when the keystroke registers. Clicky switches add an audible click that happens at the same moment as the tactile bump, giving you both physical and acoustic confirmation.
Membrane keyboards produce a muted, uniform sound no matter how hard you type, because the rubber dome absorbs the impact. Mechanical keyboards generate sound from multiple sources: the switch mechanism itself, the keycap hitting the switch housing, and the PCB resonating. All of those can be adjusted through component choices and dampening materials.
When Membrane Keyboards Make More Sense
Mechanical keyboards aren’t the right fit for every situation. In shared office environments with noise restrictions, even silent mechanical switches can be a problem because the sound of keycaps hitting the housing is still audible. If your budget is under $50, a quality membrane keyboard will likely serve you better than a cheap mechanical option that cuts corners on switch quality or build materials. And if you need something ultra-thin and lightweight for travel, low-profile membrane designs have an edge that mechanical keyboards can’t match without giving up key travel and tactile feel.
Understanding Mechanical Keyboard Switch Types
The switch you choose shapes your entire typing experience, but most beginners have a hard time translating specs into what something actually feels like. The three main switch types, linear, tactile, and clicky, each create a different sensory experience based on how they’re built inside.
Linear Switches: Smooth and Consistent Travel
Linear switches move straight down with no bump or click, giving you uninterrupted travel from the first press to the bottom. The force stays constant throughout, typically ranging from 45g (light) to 65g (heavy) depending on the spring. It feels a bit like pressing a smooth pen clicker: consistent resistance, no surprises.
Common examples include Cherry MX Red (45g actuation), which has light spring tension favored by gamers for quick double-taps; Cherry MX Black (60g actuation), which has heavier resistance that cuts down on accidental keypresses; and Gateron Yellow (50g actuation), a budget-friendly option with smooth factory lubrication. Linear switches work well for fast-paced gaming, users who want minimal distraction while typing, and situations where you need to keep noise down compared to tactile or clicky options.
Tactile Switches: Physical Feedback at Actuation
Tactile switches have a deliberate bump built into the stem right at the actuation point, typically 2mm into the 4mm total travel. That bump gives you physical confirmation that the keystroke registered without needing to press the key all the way down. It feels like hitting a small speed bump mid-keystroke, and how sharp that bump feels varies quite a bit between switch models.
Cherry MX Brown (45g actuation) has subtle tactility that many people describe as slightly scratchy because the bump isn’t very prominent. Gateron Brown (55g actuation) offers more noticeable tactile feedback than Cherry’s version, with smoother stem travel. Glorious Panda (67g actuation) delivers aggressive tactile feedback with a distinct snappy sensation at the actuation point. These switches are a good fit for touch typists who want keystroke confirmation without noise, programming work where precise key registration matters, and users coming from membrane keyboards who expect physical feedback.
Clicky Switches: Audible and Tactile Confirmation
Clicky switches combine the tactile bump with a separate click mechanism that produces a distinct sound right at the actuation point. A click bar or click jacket inside the housing creates a sharp, high-pitched sound that confirms the keystroke both physically and acoustically. It sounds a lot like clicking a ballpoint pen repeatedly: a sharp, distinct noise that carries across a room.
Cherry MX Blue (50g actuation) is the classic clicky switch, with a crisp, high-pitched click and a pronounced tactile bump. Kailh Box White (50g actuation) uses a sharper click bar mechanism for louder, more aggressive feedback. Kailh Box Jade (60g actuation) is a heavier clicky switch with a thick click bar that produces a deeper, more resonant sound. The volume makes all of these a poor choice for shared workspaces, video calls, or late-night typing in shared living spaces.
| Switch Type | Actuation Force | Feedback Style | Sound Level | Best Use Case |
|---|---|---|---|---|
| Cherry MX Red (Linear) | 45g | None | Low | Fast-paced gaming, quiet environments |
| Cherry MX Brown (Tactile) | 45g | Light bump | Medium | General typing, office work |
| Glorious Panda (Tactile) | 67g | Sharp bump | Medium | Touch typing, programming |
| Cherry MX Blue (Clicky) | 50g | Bump + click | High | Private workspace typing |
| Kailh Box Jade (Clicky) | 60g | Heavy bump + click | Very High | Enthusiast typing experience |
Actuation Point and Travel Distance Explained
The actuation point is the exact distance a switch needs to travel before it registers a keystroke, typically 2mm for most mechanical switches. Total travel distance is how far the key moves from rest to fully bottomed out, usually 4mm. The important thing to understand is that you don’t need to bottom out the key to register a press. The switch activates halfway through its travel.
Membrane keyboards require full compression to register, so you have to press through the entire 4mm. Mechanical switches register at 2mm, which lets you type faster by reducing how far your fingers need to travel. That 50% reduction in required travel is a big part of why experienced typists tend to be faster on mechanical keyboards.
Keyboard Layouts and Form Factors Explained
The layout you choose determines which keys are physically on the board and how much desk space it takes up. It also affects your workflow, portability, and whether you’ll need to relearn where certain keys are.
Full-Size (100%) Layout
Full-size keyboards include all 104-108 keys: the alphanumeric section, function row, navigation cluster (Insert, Delete, Home, End, Page Up, Page Down), and a dedicated number pad. The board is about 17.5 inches wide and uses the traditional key spacing most people learned on.
You get every key exactly where you expect it, with no learning curve, plus a dedicated number pad for data entry, accounting, and spreadsheet work. The downside is that the wide footprint pushes your mouse farther to the right, which creates awkward shoulder angles for right-handed users and eats up a lot of desk space. This layout works well for accountants, data entry professionals, people with large desks, and anyone who regularly inputs numerical data.
Tenkeyless (TKL/80%) Layout
TKL keyboards drop the number pad but keep the function row, navigation cluster, and arrow keys. That trims the board down to about 14 inches wide, bringing your mouse 3.5 inches closer to your centerline. The ergonomics improve because you’re not reaching as far for the mouse, and you still have all the navigation and function keys you need for most software. If you want to get the most out of your keyboard and mouse positioning, following an ergonomic keyboard and mouse setup guide can help you dial in the right placement for your workspace.
You’ll need to use the top row number keys for data entry, which slows things down for heavy numerical input. But the size reduction doesn’t sacrifice any frequently-used keys. This layout is a solid choice for gamers who want more mouse space, programmers who rarely input numerical data, and users who want better ergonomics without having to relearn key positions.
Compact Layouts: 75%, 65%, and 60%
Compact layouts remove more keys as they get smaller. The 75% layout (about 12.5 inches wide) compresses the navigation cluster vertically while keeping the function row, which is a reasonable middle ground between compact and functional. The 65% layout (about 12 inches wide) drops the function row but keeps the arrow keys and a few navigation keys. The 60% layout (about 11.5 inches wide) has only the alphanumeric section, so everything else requires function layer combinations.
Compact layouts free up desk space and travel well, but they take time to get used to. The 75% works well if you want a smaller footprint without giving up function keys. The 65% suits writers and content creators who rely on arrow keys for text editing. The 60% appeals to minimalists who are willing to put in the time to learn function layer shortcuts in exchange for maximum portability.
Important Mechanical Keyboard Terminology
Knowing the basic terminology saves a lot of confusion when you’re researching keyboards and trying to make sense of specs. These terms come up constantly in product descriptions, reviews, and community discussions.
Hot-swap sockets: PCB-mounted sockets that let you pull switches out and push new ones in without soldering. Hot-swap boards make it easy to test different switch types without any permanent commitment.
PCB (Printed Circuit Board): The internal circuit board that picks up switch inputs and sends them to your computer. PCB quality affects how stable the switches are mounted and how reliable the electrical connections are.
Stabilizers: Wire mechanisms under larger keys like the spacebar, shift, enter, and backspace that keep the keycap from wobbling and make sure it travels evenly. Bad stabilizers cause rattling and an inconsistent feel on those bigger keys.
Keycap profile: The shape and height of the keycaps across rows. Common profiles include Cherry (low, sculpted), OEM (medium height, sculpted), and SA (tall, spherical). The profile affects your typing angle and how far your fingers have to reach.
Keycap material: Most keycaps are made from ABS (smooth, gets shiny quickly) or PBT (textured, resists shine) plastic. PBT costs more but holds up better over years of use.
N-key rollover (NKRO): The ability to register every key pressed at the same time without ghosting. This matters for gaming and fast typing where multiple keys get pressed in quick succession.
Prebuilt vs Custom Mechanical Keyboards
Choosing between prebuilt and custom comes down to how much you want to spend upfront, how much you want to customize, and whether you’re willing to learn how to put a keyboard together. Both are valid starting points depending on what you care about.
Prebuilt Mechanical Keyboards
Prebuilt keyboards come fully assembled with switches, keycaps, and stabilizers already installed. You plug it in and start typing. No assembly, no component research required. You get immediate usability, manufacturer warranty coverage, guaranteed compatibility between parts, and a lower entry cost ($60-150) compared to an equivalent custom build.
The trade-offs are that switch selection is limited to whatever the manufacturer offers (usually 3-5 choices), keycaps are often thin ABS plastic with pad-printed legends, and stabilizers frequently need tuning to get rid of rattle. Good prebuilt options for beginners include the Keychron C1/C2 ($50-70, with hot-swap variants), the Royal Kludge RK61 ($40-60, a budget 60% layout), and the Ducky One 3 ($100-130, a premium prebuilt with PBT keycaps).
Custom Mechanical Keyboards
Custom builds mean buying separate components (case, PCB, switches, keycaps, stabilizers) and assembling them yourself. You get complete control over every component, access to hundreds of switch options, premium materials you won’t find in prebuilt boards, and the ability to tune stabilizers and dial in the sound profile you want.
The trade-offs are real: researching compatible components takes time, assembly takes 2-4 hours for a first build, entry-level components run $150-300, and you’re on your own when something goes wrong. To keep things manageable, start with a hot-swap kit from a single vendor to avoid compatibility issues, buy a switch tester ($15-25) to figure out what you like before committing, budget $150-200 to start, and follow the vendor’s assembly guide.
Decision Framework
Go with a prebuilt if you want to start typing right away, want manufacturer warranty protection, or aren’t interested in customizing individual components. The $60-130 range has solid options, and hot-swap versions let you experiment with switches later. Go custom if you want specific switches that prebuilts don’t offer, care about premium materials and sound quality, or just enjoy the building process.
A good middle path is to start with a hot-swap prebuilt ($70-100), use it to figure out what you like, then move to a custom build once you know what you actually want. That approach keeps your initial cost low while giving you the hands-on experience to make smarter component choices later.
Making Your First Mechanical Keyboard Choice
Your first mechanical keyboard should match how you actually use it and where you’ll be using it, not whatever the enthusiast community is excited about right now. Here’s a practical way to think through the right combination of layout, switch type, and build approach for your situation.
Use Case Priority Assessment
If gaming is your main focus, go with linear switches (Cherry MX Red, Gateron Yellow) for fast key taps without tactile resistance, consider a TKL or smaller layout to give your mouse more room, and don’t worry about polling rates above 1000Hz since the difference is negligible. For programming and heavy typing, tactile switches (Cherry MX Brown, Glorious Panda) give you keystroke confirmation without noise, a 75% or 65% layout balances compactness with arrow key access, and PBT keycaps hold up better during long sessions.
In an office or shared space, use silent switches (Cherry MX Silent Red, Gateron Silent Brown) to avoid bothering people around you, stick with a full-size or TKL layout so the key positions stay familiar, and skip clicky switches entirely. If budget is your main concern, target a $60-100 prebuilt with hot-swap support so you can try different switches later, focus on switch quality over keycap aesthetics, avoid paying for features that don’t improve the typing experience, and check the used market for premium brands at 40-50% off retail.
Common Beginner Mistakes to Avoid
Buying clicky switches for a shared space is a quick way to annoy coworkers, roommates, or family members who have to listen to 60-70dB of clicking from across the room. Start with linear or tactile switches. You can always pick up clicky switches later if your environment allows it. Choosing a 60% layout as your first keyboard means relearning your entire workflow and rebuilding muscle memory from scratch. Start with a TKL or 75% so you keep arrow key and function row access while still gaining some desk space.
Spending too much on your first board often leads to regret once you realize you prefer different switches, a different layout, or a different sound profile. Start with a $60-100 prebuilt, learn what you like, then put money into a custom build with a clear target in mind. Skipping a switch tester means buying 70+ switches you might not like. A $15-25 tester with 9-12 common switches can save you from that mistake. And don’t assume all mechanical keyboards are loud. Silent switch variants, especially when paired with O-rings or foam dampening, can be just as quiet as a quality membrane keyboard. Pairing your keyboard with the right surface also makes a difference — a desk mat vs mouse pad comparison can help you decide which workspace surface works best for your setup.
Building Your Mechanical Keyboard Knowledge Foundation
Mechanical keyboards offer real advantages in durability, customization, and typing experience when you pick components that actually match how you work and where you work. Switch type, layout size, and build approach matter far more than brand names or looks when it comes to whether a mechanical keyboard actually improves your day-to-day computing. Start with a hot-swap prebuilt in the $70-100 range to test your switch preferences before putting money into a custom build. That keeps your financial risk low while giving you the hands-on experience to figure out which specs actually matter for your workflow.
Frequently Asked Questions About Mechanical Keyboards
Are mechanical keyboards actually worth the higher cost compared to membrane keyboards?
Mechanical keyboards are worth the extra cost if you type more than 2-3 hours a day, care about customization, or need the durability that comes with 50+ million keystrokes per switch. For casual users who type less than an hour a day, a quality membrane keyboard does the job at a lower price.
How much should I expect to spend on my first mechanical keyboard?
Budget $60-100 for a quality prebuilt with hot-swap capability, or $150-200 for an entry-level custom build. Spending under $50 usually means cutting corners on switch quality or build materials, which undercuts the whole point of going mechanical.
Can I use mechanical keyboards for gaming and typing, or do I need separate boards?
One mechanical keyboard works fine for both. Choose linear switches (Cherry MX Red) if gaming is your main focus, or tactile switches (Cherry MX Brown) if typing comes first. Separate boards only make sense if you want drastically different switch types for each activity. If you’re also deciding between a controller and keyboard for gaming, a controller vs keyboard and mouse comparison can help you figure out which input method suits your games best.
Do all mechanical keyboards make loud clicking sounds?
Only clicky switch types (Cherry MX Blue, Kailh Box White) produce the loud clicking sound people associate with mechanical keyboards. Linear and tactile switches make moderate noise from keycap impact, and silent switch variants (Cherry MX Silent Red) operate at volume levels comparable to membrane keyboards.
What’s the difference between hot-swap and soldered mechanical keyboards?
Hot-swap keyboards use PCB-mounted sockets that let you pull switches out and push new ones in without any tools or soldering. Soldered keyboards require desoldering and resoldering to change switches, which means you’re committing to whatever switches you start with.
How long do mechanical keyboard switches typically last before needing replacement?
Reputable switches like Cherry MX and Gateron are rated for 50-100 million keystrokes, which is enough to last a decade or two of heavy daily use. Replacement is rarely necessary unless there’s physical damage, which means your switch choice matters far more upfront than it will in maintenance costs later. If you’re still weighing your options, a switch comparison guide can help you find the right fit from the start.